Reverse Prospecting helps to connect agents who have listings, with other agents who have prospects that may be interested in those listings. Prospect information is never shared with the agent performing the search, so you can have full confidence in allowing your prospects to be included in reverse prospecting searches.
To enable reverse prospecting for your prospect
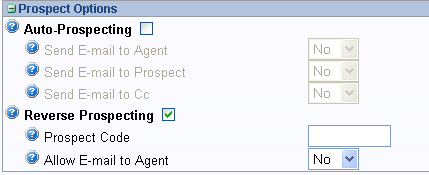
NOTE: Be sure to assign a Prospect Code to each of your prospects so that you can identify them when another agent contacts you. You can use up to six digits, alpha or numeric. For example, you may want to use your prospect’s initials and the last two digits of their ZIP code. If you do not type in a prospect code and Allow E-mail to Agent has been set to Yes, the system automatically assigns one for you.
TIP:  View the video tutorial entitled "Reverse Prospecting" on the Learning Center for a quick overview of this feature. The Learning Center can also be accessed directly from the Help menu.
![]()